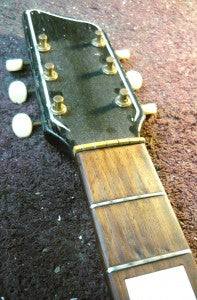
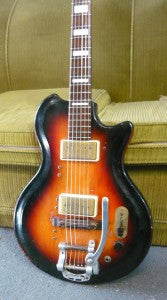
So, this old beauty came into the shop a few weeks ago for a bit of work and it's just lovely. We don't see a lot of these around here and I've only ever worked on a hand full of them over the years but I'm always pleasantly surprised how they end up sounding.
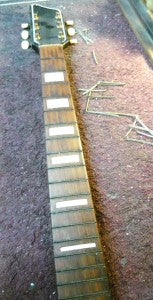
First up was a refret. The frets were very worn and making the guitar almost impossible to play in the open chord area due to buzzing and there wasn't enough fret left to do a decent dress and re-crown.
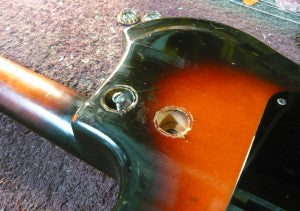
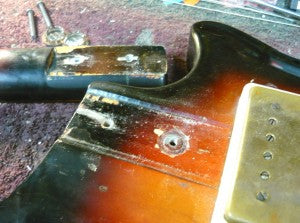
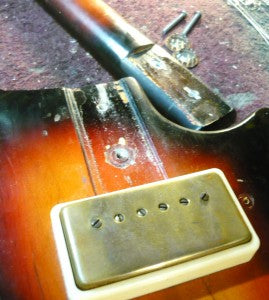
Since it's a bolt on the neck come so off to do the work. These guitars have a rather strange way of attaching the neck to the body. There are two metal bolts that go through the body and into metal ferruls. There's a VERY slight recess where the neck sits in the body but nothing like a "pocket". To be honest,it's not a great system, but it's been working OK for longer than me, so we'll go with it.
So, next up is getting the old frets out. As I've said before, I heat them up first in case of any glue used in manufacturing or previous refrets. These came out fairly easily and didn't cause any issues like chipping. The fretboard is pretty soft so I decided I was going to glue the new frets back in for better adhesion.
With the fretbaord leveled and cleaned it was time for the new frets to go back in. Like I said, these were glued in and I used my press rather than the hammer to seat them properly. With a fretboard that's as soft as this one, hammering can be tricky and sometimes cause low spots. A well gauged press with just the right amount of pressure works better for me.
Next up I nip the ends off the new frets and clean up the ends with a file to match the edge of the fretboard. Then the angle is put on using a file. This neck had a very rounded edge to the board so I used a slightly more rounded angle on the frets too, otherwise you can really feel the edges.
With the refret nearly don, it was time to look at the rest of the guitar and get it ready to put the neck back on. The guitar is in pretty good condition really. Everything worked and the electrics just needed a little attention, but it's such a crazy system I couldn't wait to get it back together and try it out.
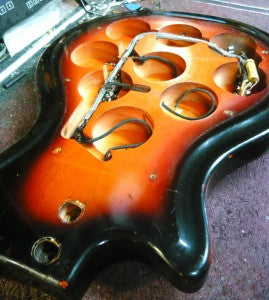
The "Swiss cheese" was factory done and I've seen this on other guitars and it can have a real positive effect on the tone of a solid body and make it easier to do work too,as in the case here.
It makes the guitar considerably lighter and this thing feels great. I particularly like the "German carve" too.
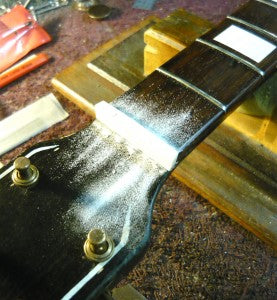
So with the neck back on and the electrics all working it was time to put the neck back on and cut a new bone nut for it.
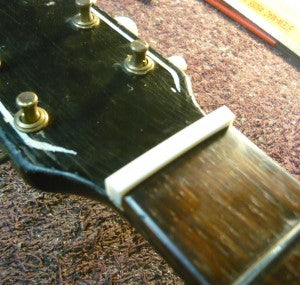
Make sure your nut slot is clean and flat and you're ready to go with a bone blank. Because of the very rounded edges to the fretboard mentioned earlier, the string spacing is a little cramped as it can't go too close to the edge of the fretboard or the strings will just slip off.
With the nut cat to close the right height it was time to polish it and glue it in. Once set it was the finishing touches and we're done. A well seated and cut nut will make a big difference to the way your guitar sounds and plays. Remember, it's one of the the take off points for your strings, the other being the bridge.
Those little brass plugs in the body above each pick up are the volume and tone controls for each pick up. VERY cool. But, there's three sets you say ? That's right, this guitar had a piezo bridge as well. The switch switches between each pick up and the knob is a master volume, but you have the choice of a bridge piezo, or standard magnetic style pick ups. Although, you'd have to set your volume and tone controls before going on stage as it might be hard to get out your little screwdriver while on the fly........... Still, very cool.
All ready to go back home. It's been a pleasure ...........


